
Designlet: Global Server Load Balancing Using NSX Advanced Load Balancer On VMware Cloud on AWS
Introduction
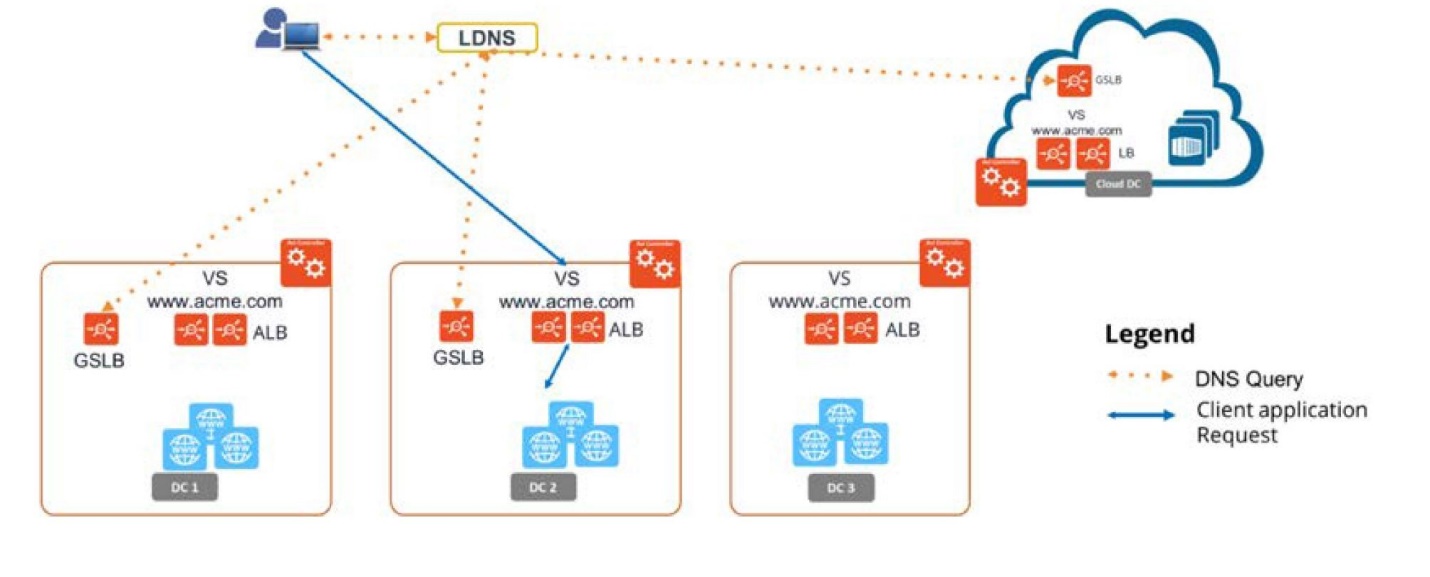
Before NSX Advanced Load Balancer was introduced, it was very difficult to provide load balancing for applications that are geographically dispersed. With the introduction of the GSLB feature in NSX ALB, global load balancing of applications has become a reality.
In a production environment, the corporate name server (hosted on-prem or using Cloud DNS like Route 53/Azure DNS) delegates one or more subdomains to NSX ALB GSLB, which then owns these domains, and provides responses to DNS queries from clients. DNS based load balancing is implemented by creating DNS Virtual Service.
GSLB offers the following benefits to the customers:
- Optimal Application Experience: Route users to nearest and available Data Center based on geo, lowest-latency, least loaded, and so on.
- Resilience to Loss of a Datacenter/Network: Real-time monitoring of application across Datacenter.
The following diagram shows the high-level architecture of NSX ALB GSLB.
Scope of the Document
This guide provides an overview of implementing Global Server Load Balancing across 2 SDDCs running in VMware Cloud on AWS.To know more about NSX ALB DNS functionality and architecture and GSLB, go to the following links:
- Avi documentation.
- To know more about the working of GSLB, refer to the NSX ALB Documentation.
Summary and Considerations
| Use Cases |
|
| Pre-requisites |
|
| General Considerations/Recommendations |
|
| Cost Implications |
|
| Performance Considerations |
|
| Documentation reference | |
| Last Updated | July 2021 |
NSX ALB GSLB Deployment & Topology
The below diagram shows a high-level topology of NSX ALB GSLB implementation across 2 SDDCs (connected via VMware Transit Gateway (vTGW) in VMware Cloud on AWS.
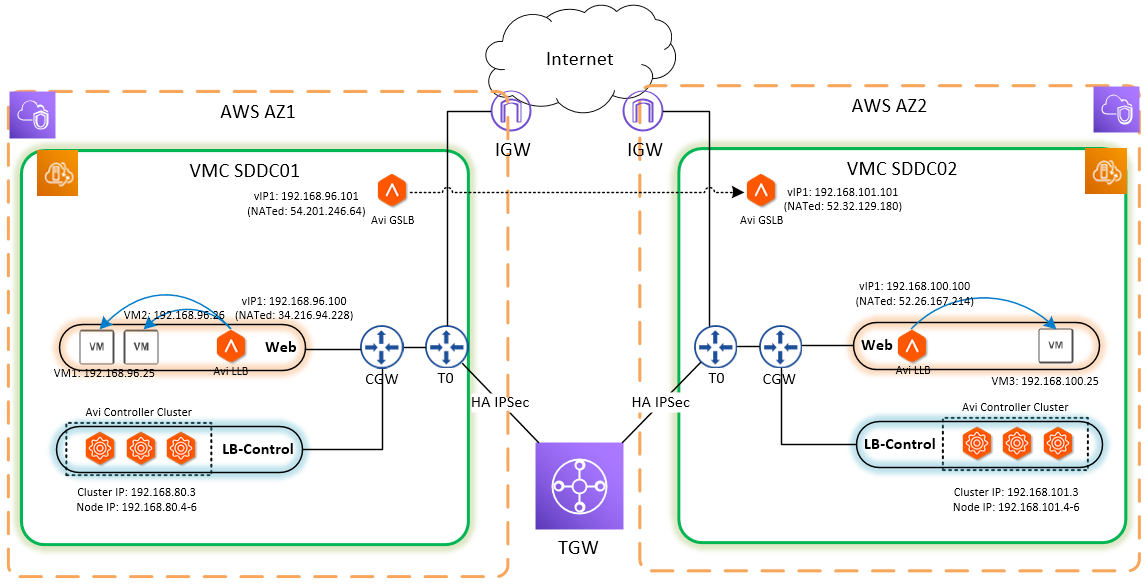
Figure 1 – Global Load Balancing in VMC on AWS SDDCs using NSX ALB
As shown in Figure 1, applications (web servers) are deployed on VMware Cloud on AWS SDDC1 and SDDC2. Also, the local instance of NSX ALB is deployed on both the SDDCs and performs local load balancing in their respective SDDCs. The 2 SDDCs are in different availability zones, hence connectivity between the 2 SDDCs is provided via VMware Transit Gateway (vTGW). The segments where applications are deployed are reachable across SDDCs.
Configure Global Server Load Balancing
The following sections describe the steps required to configure GSLB.
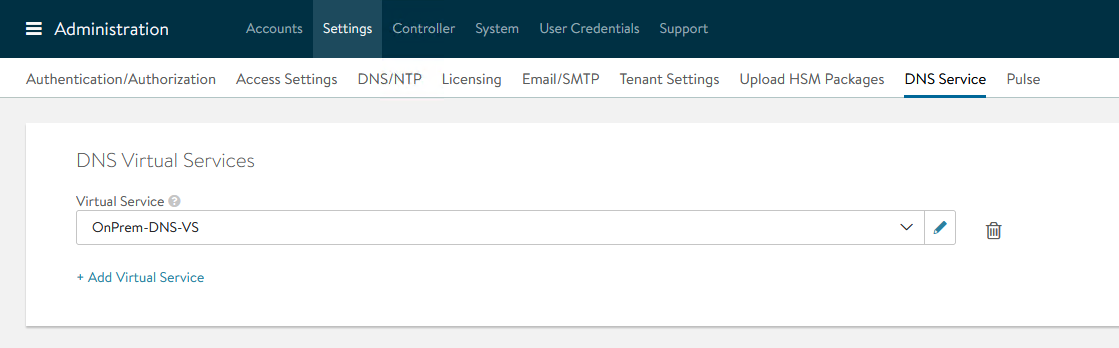
Create DNS Virtual Service
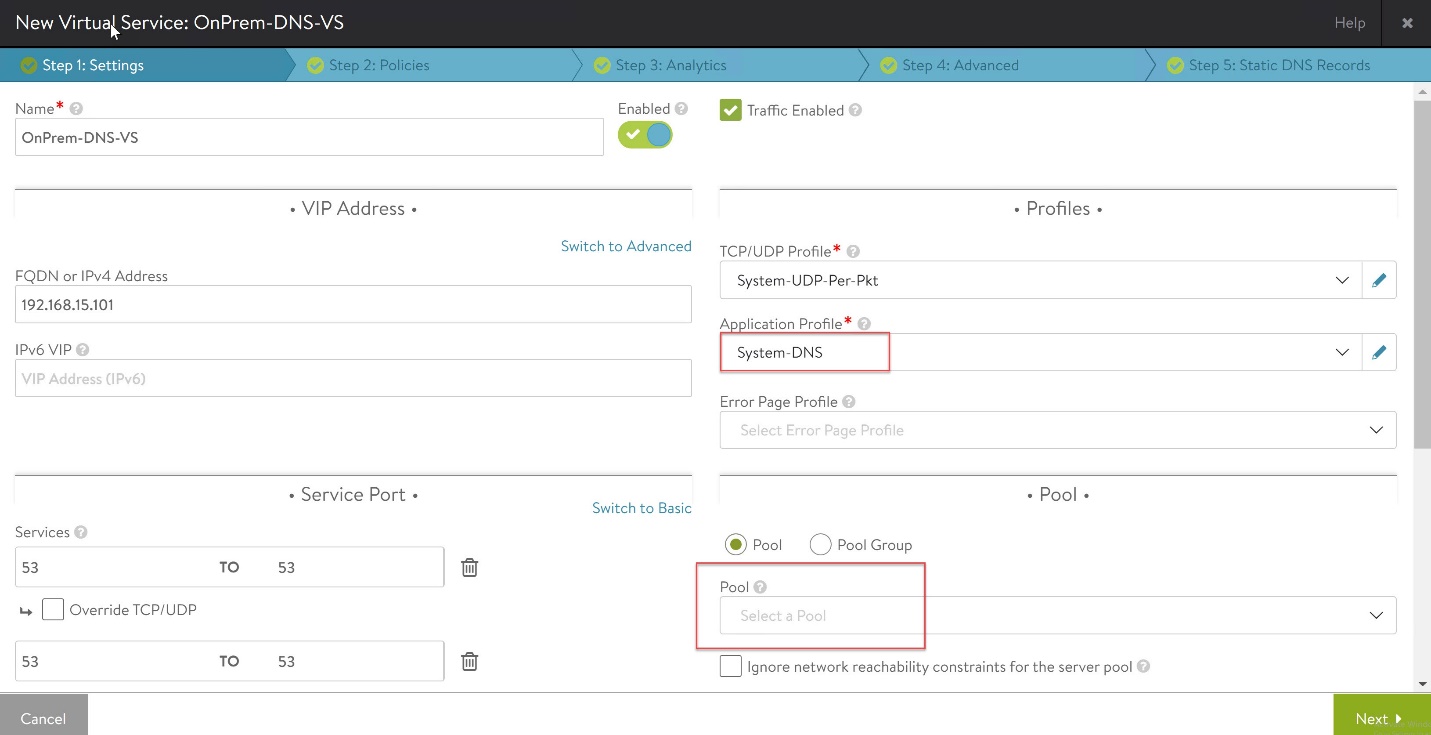
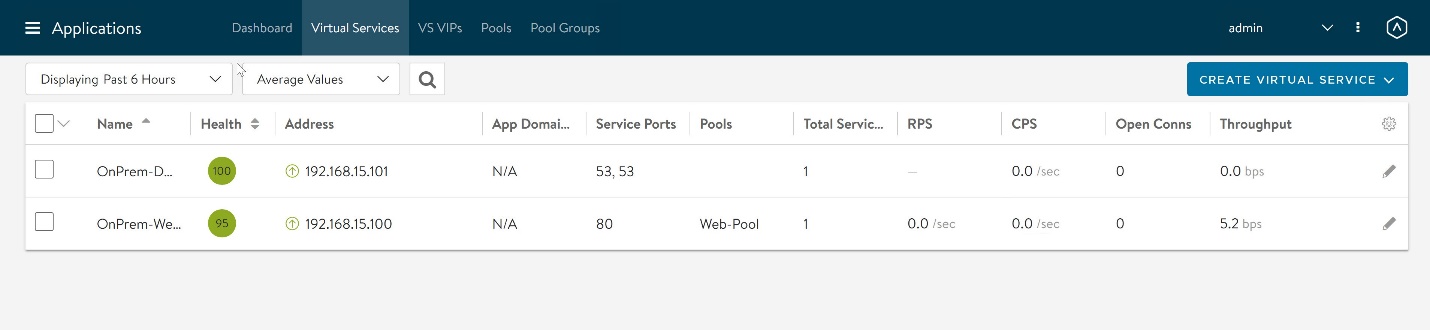
GSLB is a DNS based solution and is implemented via DNS Virtual Service. To create DNS Virtual Service, log in to the NSX ALB controller of SDDC1 and navigate to Applications > Virtual Services > Create Virtual Service > Advanced Setup.
Configure the following settings:
- Name: Provide a name for the DNS Virtual Service.
- FQDN/IPv4 Address: Provide a free IP address from the pool which you configured for NSX ALB VIP. If the IP address is DNS resolvable, you can provide FQDN instead.
- Application Profile: Choose System-DNS profile.
- TCP/UDP Profile: Accept the default for the TCP/UDP Profile field (System-UDP-Per-Pkt)
- Pool: No pool is required; the DNS service will run within the SE’s virtual machine.
- Service Port: Select Port 53 by switching to advanced view under the Service Port sub-section.
For DNS virtual service, you can leave the other settings (Policies/Analytics/Advanced) to system default unless you want to turn on specific functionality. Before modifying any settings on these pages, please refer to the NSX ALB documentation.
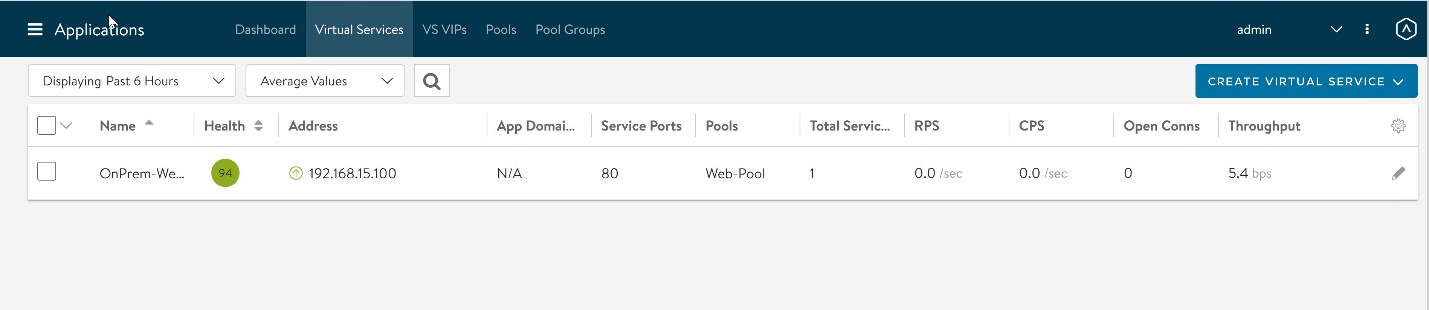
Check to make sure that the newly created DNS virtual service is up and running.
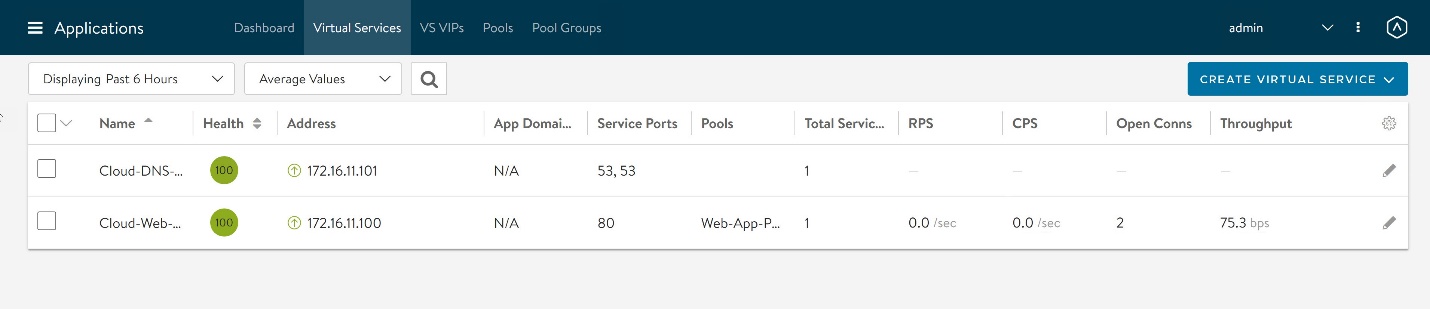
Repeat the process in the second SDDC.
Configure GSLB Sites
NSX Advanced Load Balancer differentiates data centers by categorizing them into sites. GSLB sites fall into two broad categories:
- Avi Sites: An Avi site refers to the environment that is running NSX ALB Controllers and Service Engines.
- External Sites: An external site runs third-party ADCs from vendors such as F5, Citrix, etc.
Each Avi site is characterized as either an active or a passive site. Active sites are further classified into two types:
- GSLB leader
- GSLB follower
The active site from which the initial GSLB site configuration is performed is the designated GSLB leader. Changes to GSLB configuration are permitted only from the leader node, which propagates those changes to all accessible followers. The only way to switch the leadership role to a follower is by overriding the configuration of the leader from a follower site. This override can be invoked in the case of site failures or for maintenance.
To learn more about Sites, read the NSX Advanced Load Balancer documentation.
Note: GSLB implementation in VMware Cloud on AWS leverages Avi Sites.
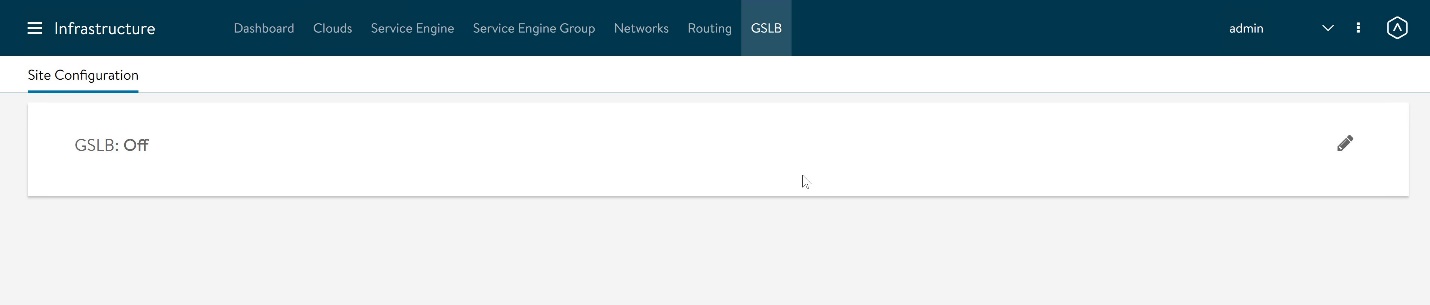
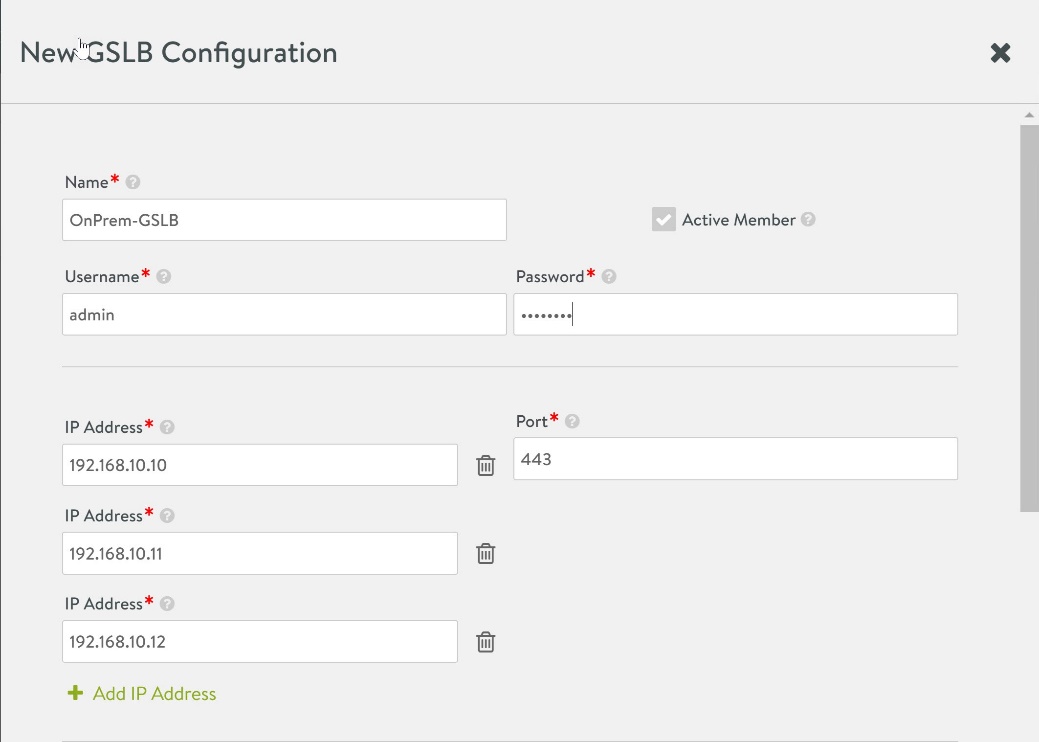
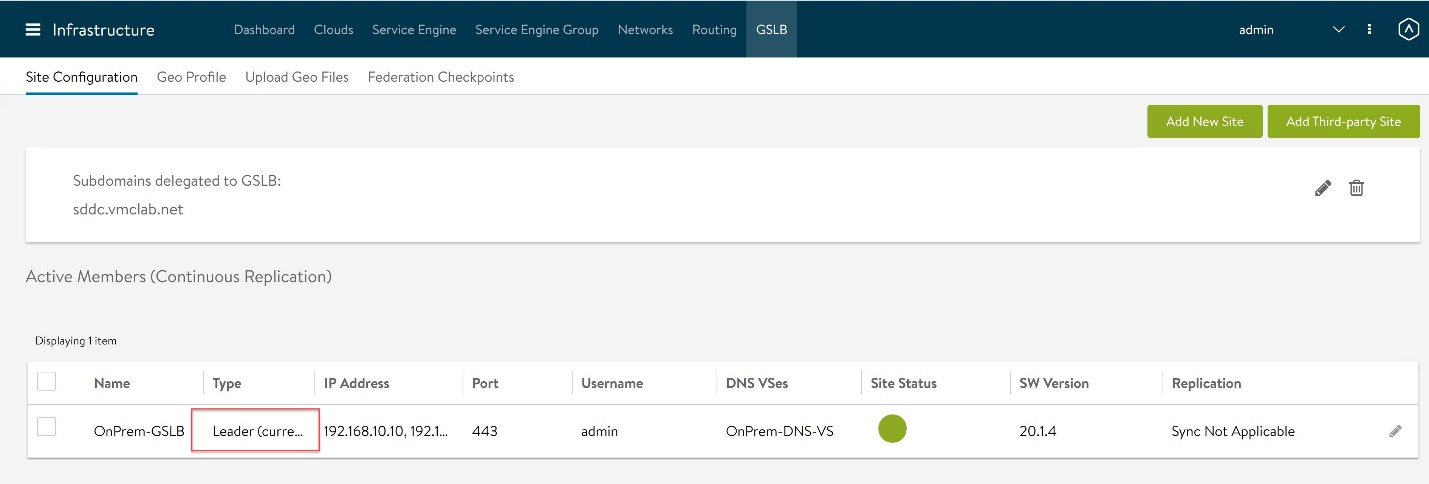
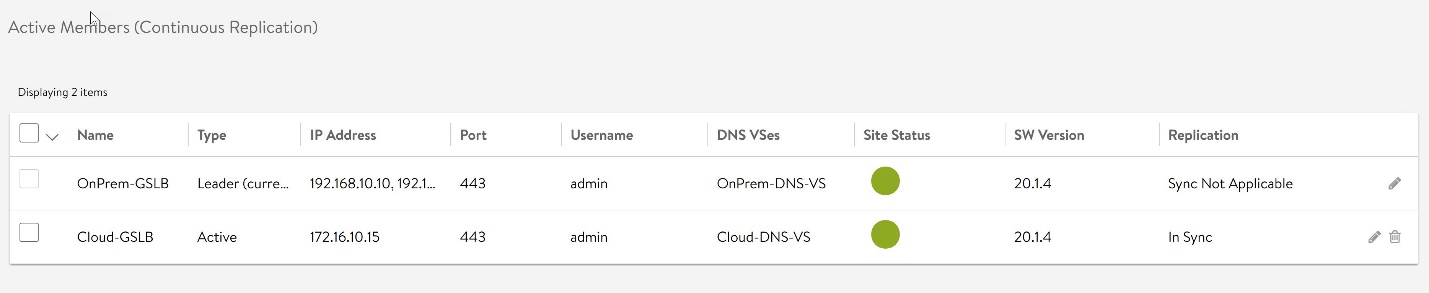
To configure GSLB sites, log in to the Controller node which will be designated as the leader and navigate to Infrastructure > GSLB, and click the pencil icon to edit the GSLB settings and define GSLB sites.
Configure the following settings:
- Name: Provide a name for the GSLB Site.
- Credentials: Provide the credentials of the controller node.
- IP Address: Provide IP address of individual controller nodes and select port as 443.
Note: You can either enter the Controller Cluster IP address or specify an individual node when configuring controller information.
Continue with the configuration:
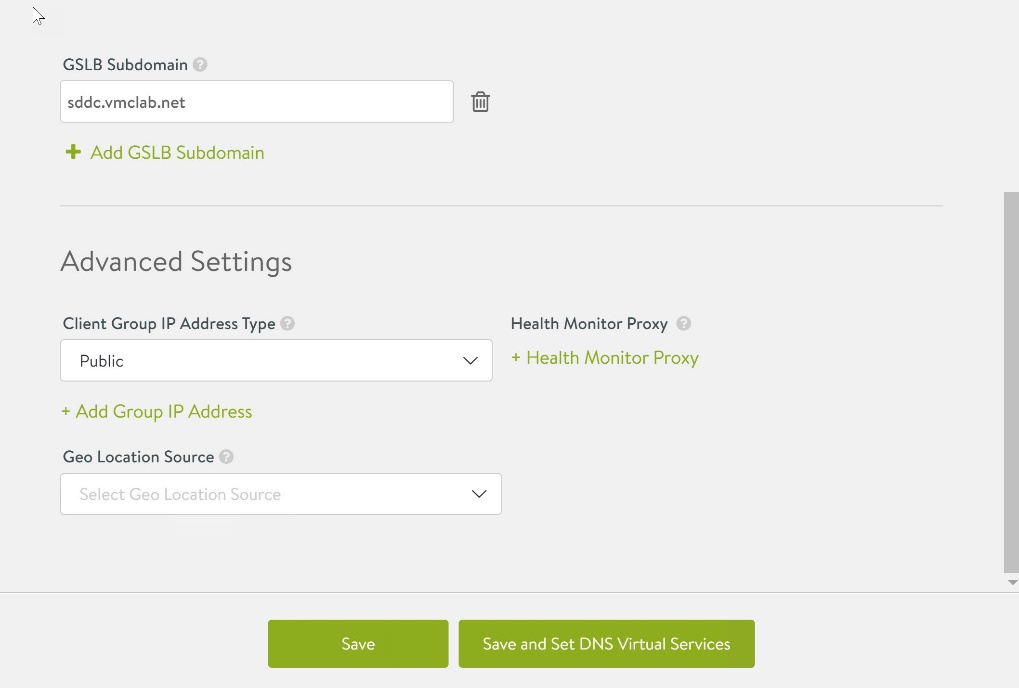
- Under GSLB Subdomain, enter a publicly resolvable URL which will be used to access the application servers. This URL will be the single point of entry for all application servers that are going to be load balanced via GSLB.
- Under Advanced Settings, configure the Geo Location if you wish to, otherwise leave it blank.
Note: A Geo Location Source can be configured by filling out the relevant fields - Name, Tag, Latitude, and Longitude. Latitude and longitude are represented in degrees.minutes. - Click Save and Set DNS Virtual Services.
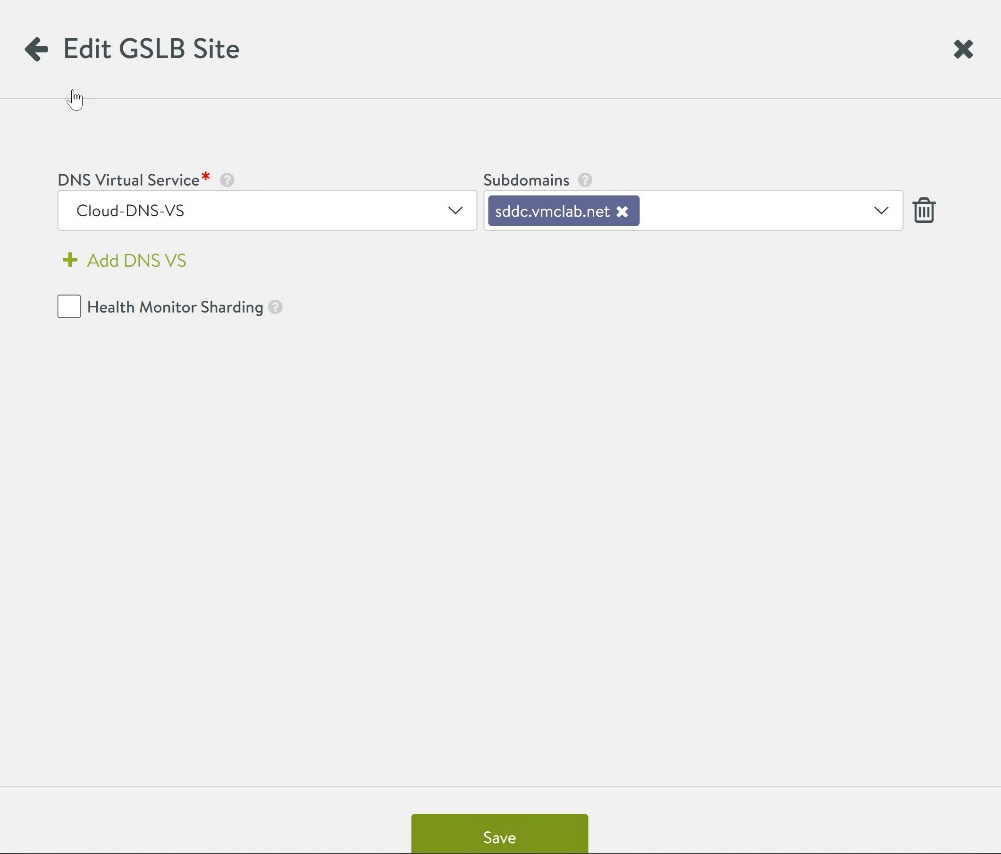
Under DNS Virtual Service, select the Virtual Service that you created earlier and map it with the GSLB Subdomain, and click Save.

The first GSLB site is always added as Active and is designated with a Leader role. Subsequent sites can be added as Active or Passive depending upon the infrastructure needs.
To add a new site, click Add New Site.
Configure the following settings:
- Name: Provide a name for the GSLB Site.
- Credentials: Provide the credentials of the controller node.
- IP Address: Provide the VIP address of the controller cluster from the second SDDC and enter port 443.
- Active Member: Selected.
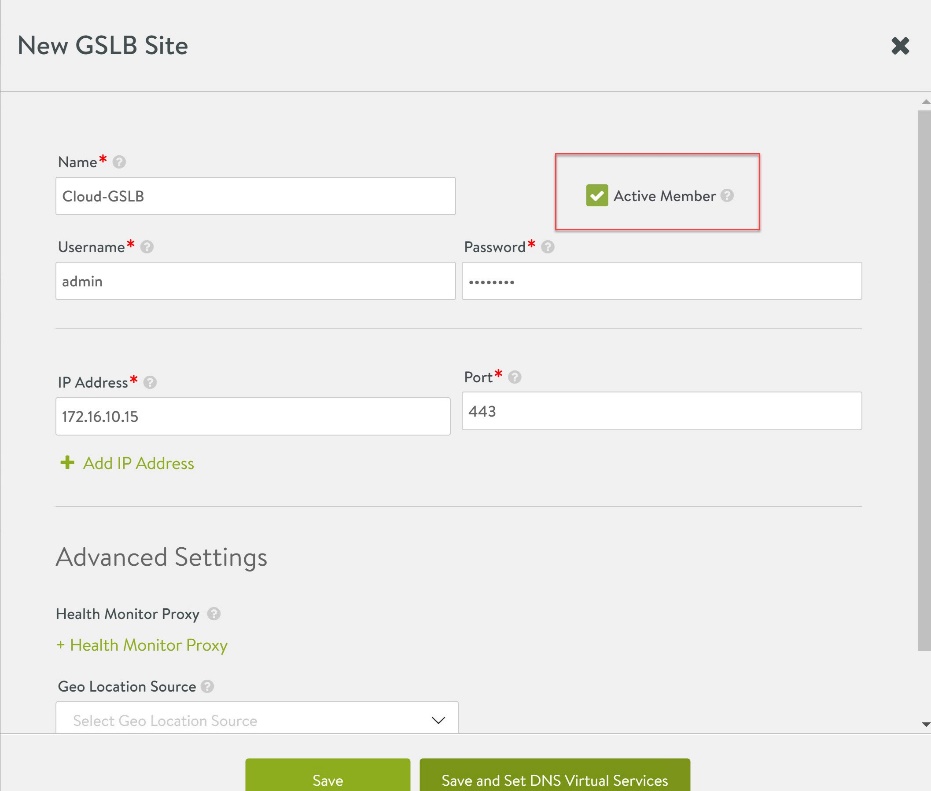
Click Save and Set DNS Virtual Services to map the DNS Virtual Service with the GSLB Subdomain and click Save to finish the site addition wizard.
At this point, the two sites are talking to each other, and configuration synchronization is enabled.
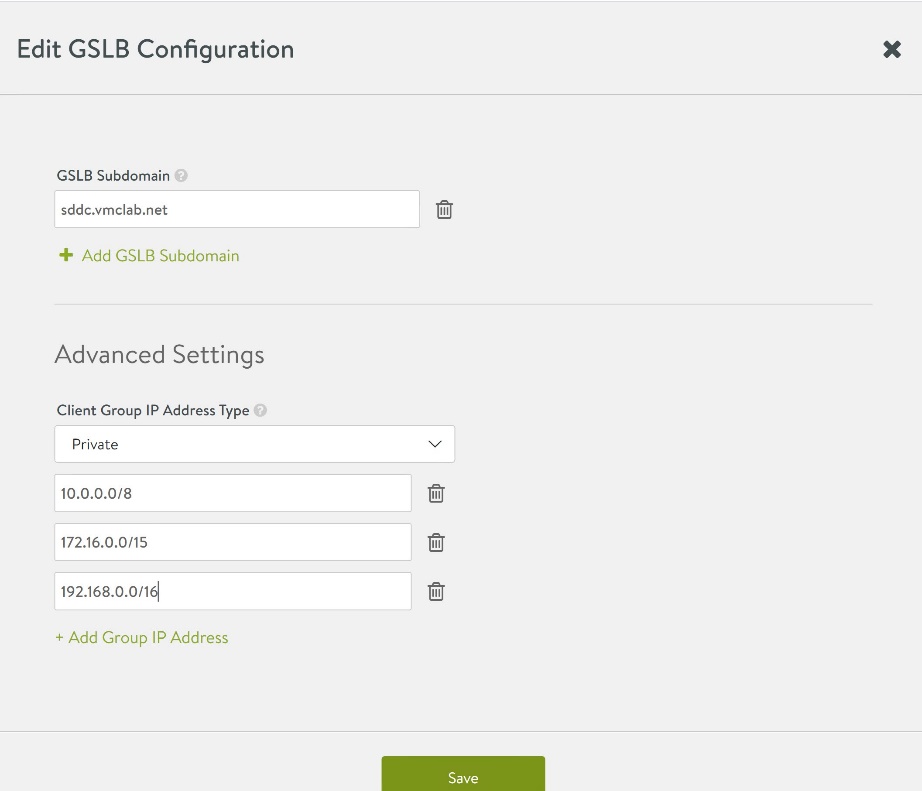
NAT Private VIP with Public VIP
Typically, the IP address used in the VIP configuration for local virtual service is a private IP address. These IP addresses are not reachable by the client over the Internet. To sort this out, you have to enable the NAT aware Public-Private GSLB feature. This feature has been described in detail Here
To configure this, navigate to Infrastructure > GSLB > Active Members and edit the settings of the Leader Site. Under Advanced Settings, select Client Group IP Address Type as Private and enter the following parameters:
- 10.0.0.0/8
- 172.16.0.0/15
- 192.168.0.0/16
Enable GSLB Service and Configure GSLB Pools
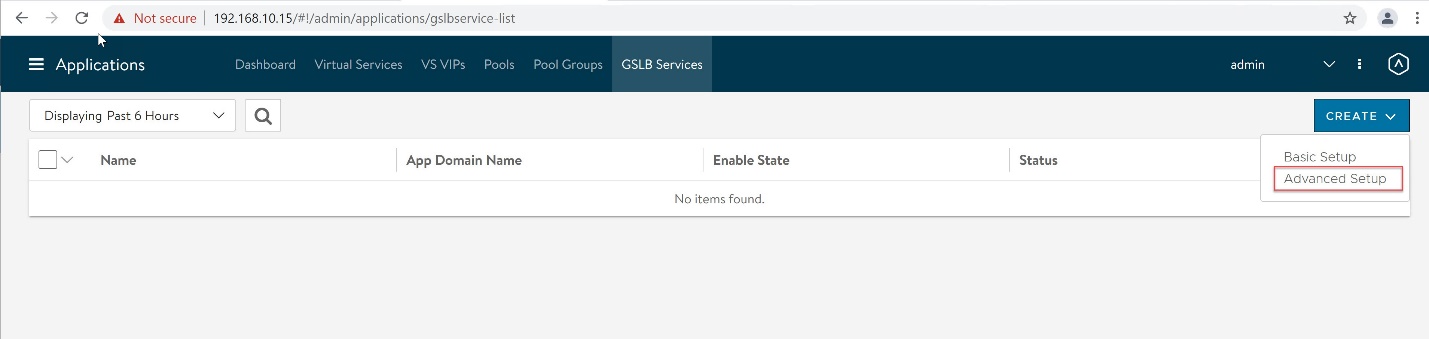
To enable GSLB service, navigate to Applications > GSLB Services > Create > Advanced Setup.
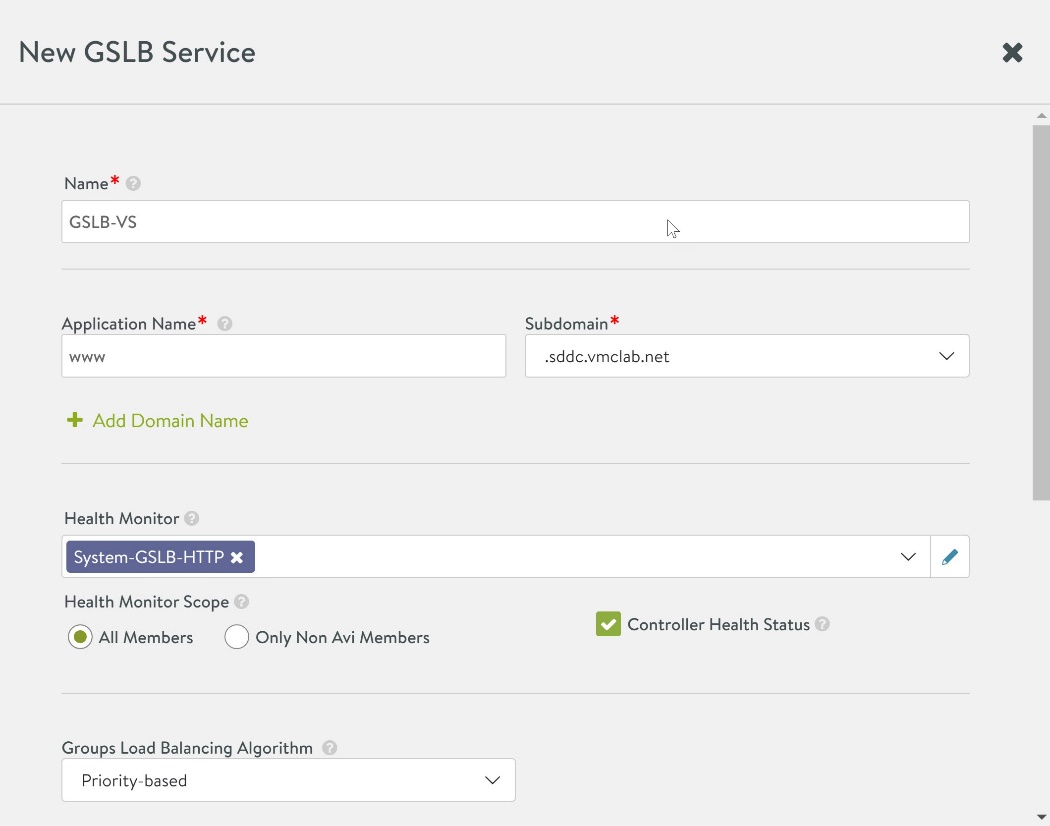
Configure the following settings:
- Name: Name for the GSLB service.
- Application Name: www
- Subdomain: Select the GSLB subdomain that you created while performing the GSLB site configuration.
- Health Monitor: Appropriate health monitor as per your application. The commonly used health monitors for web-based applications are System-GSLB-HTTP and System-GSLB-HTTPS. To learn more about GSLB Service Health Monitors, please see the documentation.
- Groups Load Balancing Algorithm: Various load balancing algorithms that can be used with GSLB Service are described in detail in the NSX ALB documentation.
- Health Monitor Scope: All Members
- Controller Health Status: Enabled
Next, create GSLB Pool members.
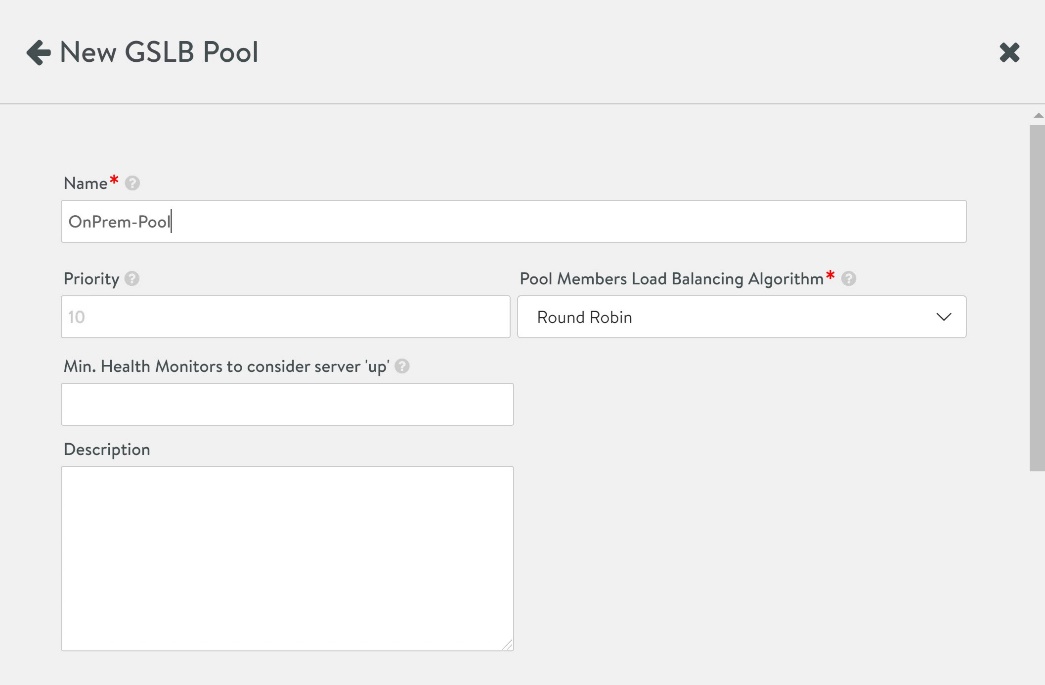
Under GSLB Pool, click Add Pool option and enter the following parameters:
- Name: Name for the GSLB Pool.
- Pool Members Load Balancing Algorithm: Round Robin (Note that this means the client will be sent to the local load balancer in both SDDC01 and SDDC02).
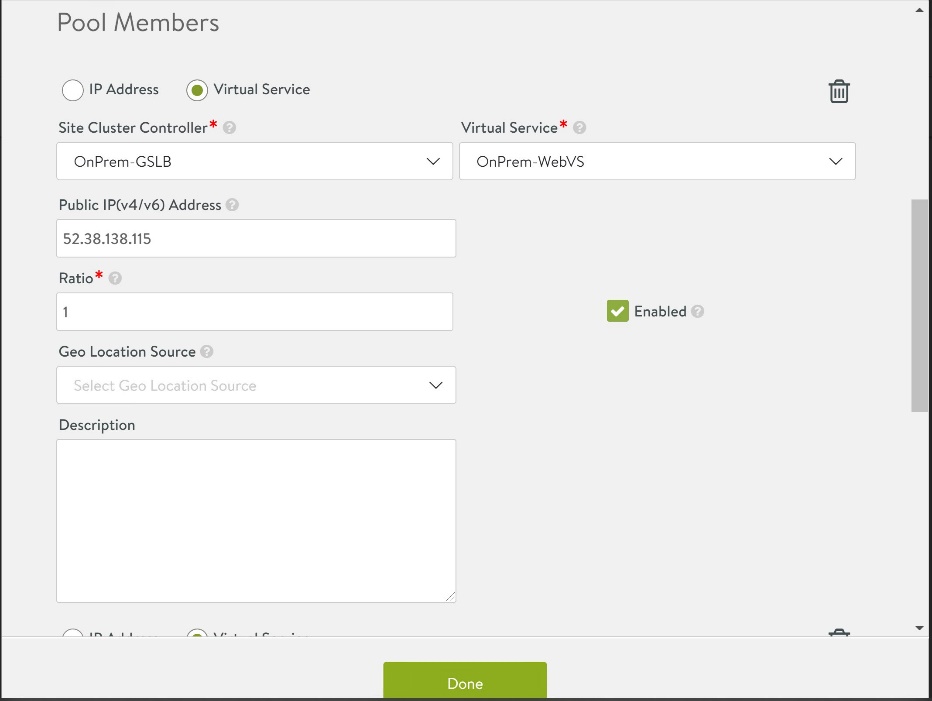
Under Pool Members, select the type as Virtual Service and configure the following settings:
- Site Cluster Controller: GSLB Leader Site.
- Virtual Service: Web Virtual Service that has been configured in the leader site (SDDC01).
- Public IP Address: Public IP address serving as VIP for the web server in SDDC01.
- Ratio: A ratio of 1 means all pool members will get an equal load.
- Enabled: Selected.
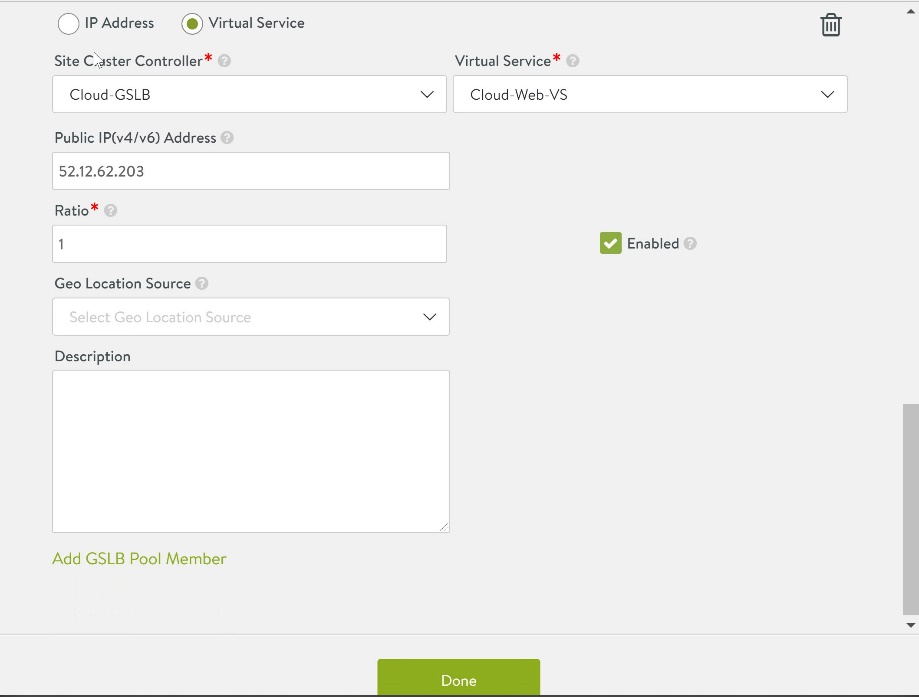
Repeat the process for additional GSLB pool members.
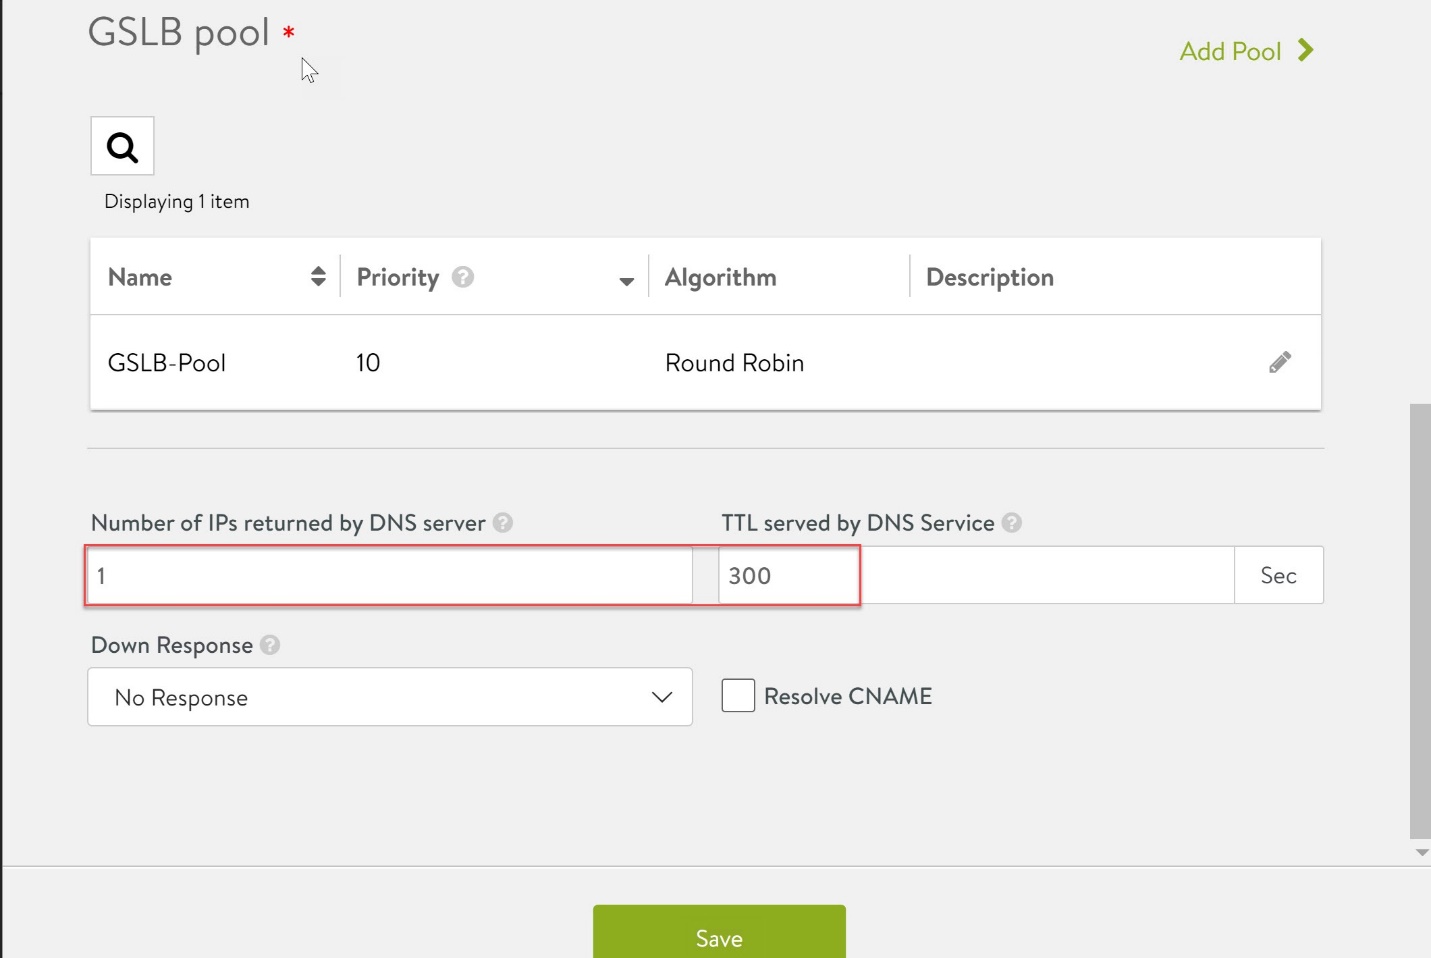
Configure the number of IPs returned by DNS Server parameter for the GSLB service and click Save to complete the pool configuration.
Create DNS Virtual Service
Configure the DNS service that was created to serve DNS queries.
The configuration of the Active-Active GSLB for the web-based application server is now completed.
Configure Public IP and NAT/Firewall Rules for DNS Virtual Service
Refer to the following links for information related to firewall and NAT rules.
| Request a Public IP Address in VMware Cloud on AWS on AWS | |
| Create NAT rules | |
| Create firewall rules in VMware Cloud on AWS |
Configure DNS Subdomain
To create DNS subdomains in a Cloud DNS, refer to the service provider documentation. A sample DNS subdomain configuration in AWS is shown in the screenshot below.

Verify Global Load Balancing
To test if the GSLB working, open a web browser and enter the application name that you have configured in your GSLB configuration.
In this example, www.sddc.vmclab.net is configured. This is a publicly resolvable URL created via AWS Route 53 service.
When you enter the application URL, you should be able to see the response from each pool member.


Author and Contributors
The following authors have contributed to this article.